Tuesday, November 5, 2013

What a grind!

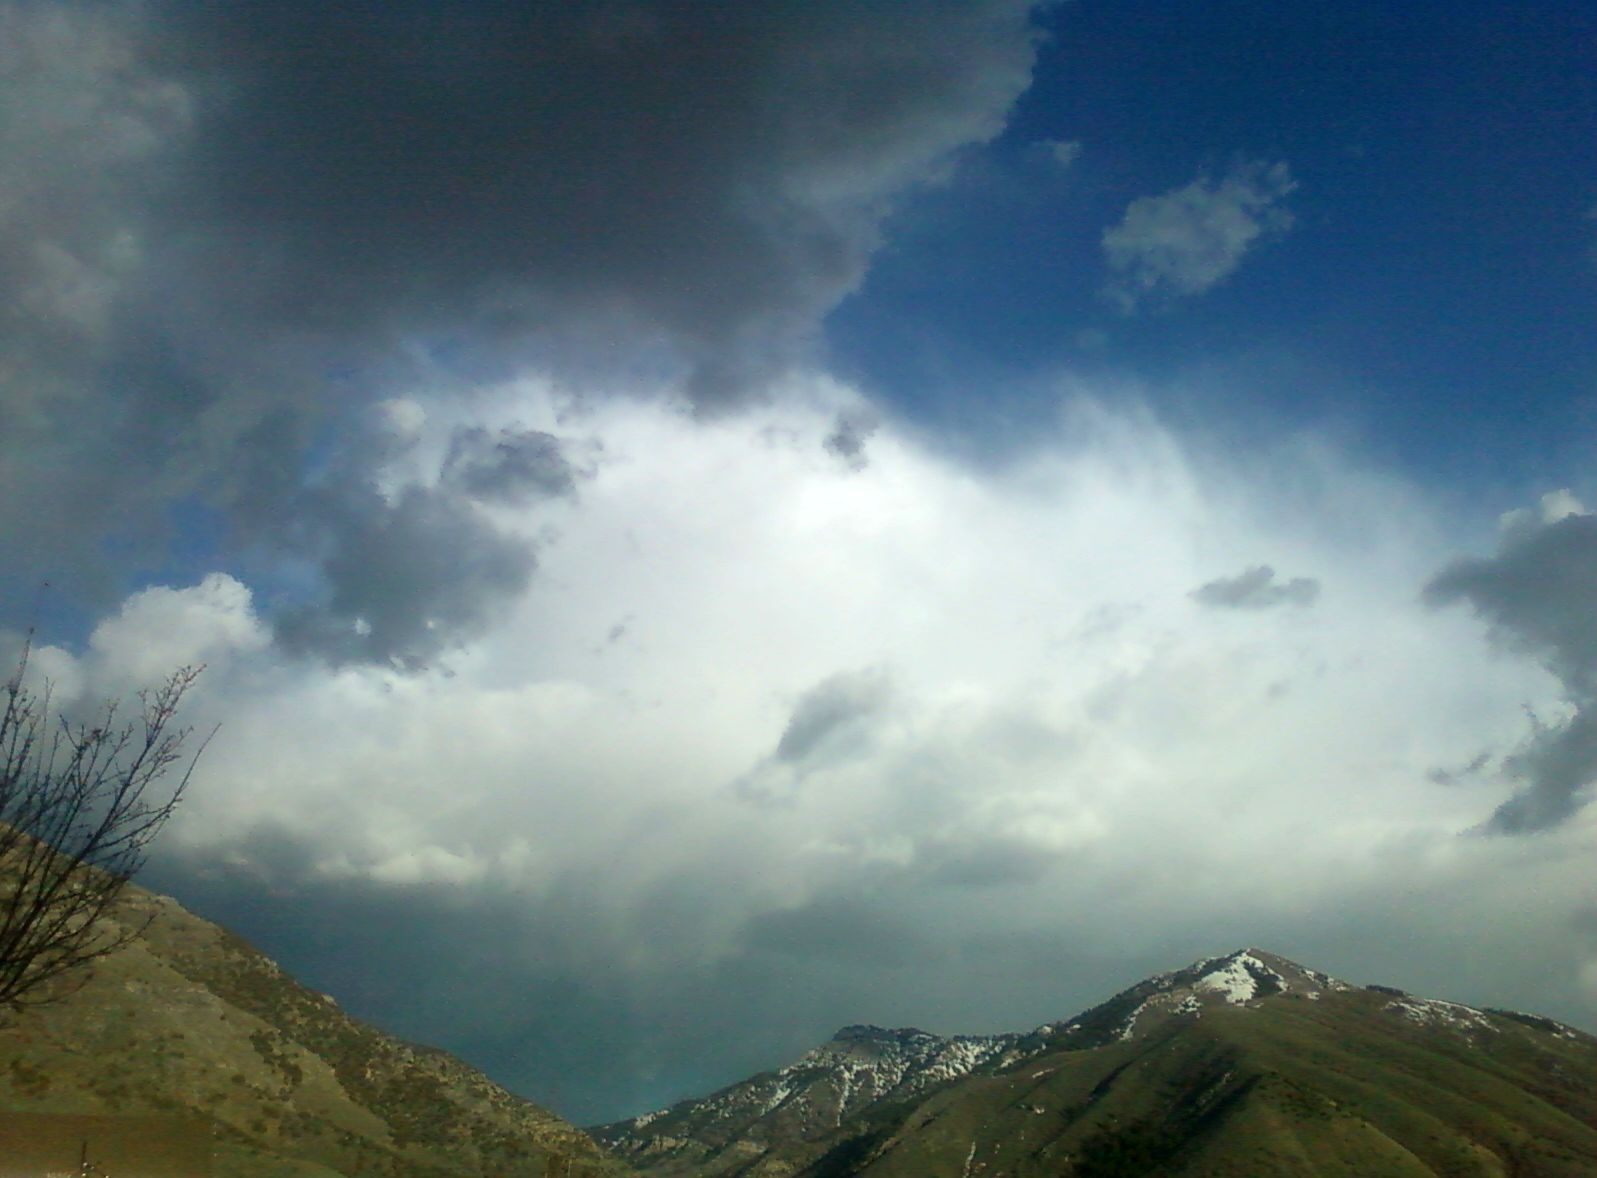
After much trial, tribulation, and telephoning, I found that a friend's dad will paint the trailer frame at a price that fits the project budget.  This means I need to brighten up the frame prior to painting.  Since the season is rapidly coming to a close, I had to get the garage to a state that I could get the frame in and still have room to work.  There is still some cleaning and organizing to take place but with the storm clouds on the horizon, I think I made a respectable dent in the other side of the garage.  So the Sprint is in winter storage at my local Harley-Davidson shop, I rearranged my storage bay to more efficiently store the items there and have moved other things from the garage out there, and I filled both the trash can and the recycle can at least twice over.  Meanwhile, this was the view from the garage door...

I love fall......but fear what is brewing over to the northwest!

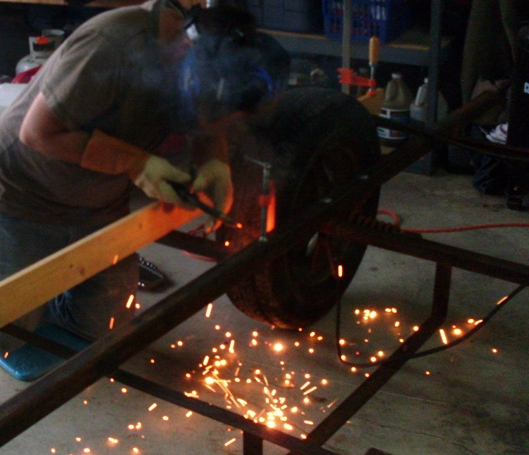
The grinding of the top and side surfaces of the frame went pretty quickly, especially as I had cleaned the frame at the beginning of the summer.  The underside was a bit more challenging.  Without sawhorses that could bear the weight of the frame, I opted for a more exciting method.  Fortunately, it didn't take long nor was a great deal of muscle involved to get the lower surfaces ready for paint.


No, I am not crazy.  Those blue tiedowns are there for a reason!
A little safety can go a long ways.  I do want to see this project all the way through!


I picked up my new tongue jack last week and figured this was the last opportunity to get it right.  After much measuring, thinking and more measuring it became clear:  the existing gusset in the frame would have to go.  It didn't appear to be original and though securely welded, the opening was not round and I just didn't feel good about it.  So out came the cutting wheel.....
 

Before....and I don't like the look of that hole
Kind of rusty under here....and I still don't like the look of that hole

In a word:  Unacceptable!


I then proceeded to fit up the new jack.  This required cutting back the center frame tube as the jackscrew casing is 2" O.D. and the existing opening in the 1-7/8" frame tube will only clear a 1-1/2" jack.  It became obvious rather quickly that a new gusset would need to be fabricated to support the jack and tie all the steel together integrally.  More measuring followed.


This'll look nice once the new gusset is in place....


....and the castor makes maneuvering a breeze!

Laser-cut parts will make short work of this!


I suppose all this will result in two certainties:  A better trailer in the end but first, MORE WELDING!!  At least the welding should be straightforward.  I just wish I knew how so I won't have to beg another favor - Mitch is in Hawaii and won't be back for another week.  In the meantime, this is what was happening outside:

It has since melted but I think there may be more to come....!


A new distraction.....for only $20!  It was only missing a knob and needed a good cleaning.  Now I can heat the garage AND cook dinner, all at the same time!  I'm ready for summer again already!

Older vintage single burner and two-bay grill Camp Chef Sport Grill


Monday, August 26, 2013

A-welding we will go....!


After months of hot weather, lawn mowing, a major wildfire (note the burned mountainside in the photo below!), and some motorcycling along the way, the welder and the frame ended up in the same location at the same time!  Three welds were required to repair the frame; in this view you can see the frame extensions in front of both wheels are missing as is the outer streetside portion of the rear frame cross member.  I have all three original pieces and they are ready to be put back in position.

Over the river and through the woods.....

...to the Torrey's house we go!


Yeah, it's only a block, a measly 660 feet, but how many months did it take to get it there?  And there were a few schedules along the way that had to line up in order for the welding to happen.  Special thanks to my good friend Mitch.  We first carefully jigged up the missing pieces on each side since we didn't want to have to cut it anything apart and start over.  Drew Johnson provided the adult supervision.  We did the curbside welds first and then the streetside received attention.

I don't want to have to redo any of this....

.....so it's important we get it right....

....the FIRST time!

Ladies and gentlemen........Mitch Torrey in action!

From the top, from the bottom.....and repeat three times

I couldn't have staged this snapshot, it just happened!

The finished product.....for tonight, at least.


Next on the to-do list:  I need to begin shopping for a tongue jack, a LP tank bracket and a new safety chain.  While that's underway, I will be trying to find someone with a sandblasting bay who will let me spend an evening cleaning things up prior to an application of POR-15.  Of course, this means the inevitable will need to occur:  I will HAVE to clean up the garage.  I don't want to leave things out in the elements especially once the frame is ready for painting.  A little bit at a time, a little bit at a time......remember, good things come to those who wait!  And elephant always tastes best in small portions!


It was a nice day.....a super nice day!

Saturday, April 27, 2013

Let it begin, let it begin, LET IT BEGIN!

I know it's been a couple of weeks but work calls....and takes me out of town on occasion.  Last week I had to make a trip to one of the hottest places in the state.....but it's not quite summer there yet.  Since the Forest Service gate was not unlocked for the season yet, a 2-1/2 hour long, five-mile hike was now on the travel itinerary.  That's five miles in......and five miles back out.  Did I mention the 1400-foot change in elevation?  I took the opportunity to hike sections of the old road to save time and enjoy a little adventure.  I'm all about "the old roads".  I don't care how arduous it was at the time, it was serene and beautiful.

The old Warner Lake campground road - long abandoned but oh how beautiful


OK, so it's time to begin the second part of the journey, the part that will take time, patience, and money.  I'm mostly worried about the patience.  If I have the patience then the time will be shorter.  And about the money part?  Well.....you know.....

I was able to locate the brass pipe necessary to create the axle bushing.  Persistence paid off in scrounging up the pipe, patience came into play in making the saw cuts.  Test fitting proved successful!

Seems to fit OK
Looks good from the other side, too
A matching set!
Enough talk - let's get to work!


At this point there was a pause in the action as the holes in the cap pieces (the smaller part of the pillow block) were slightly undersize for the bolts to pass through.  Chasing them with a drill cleaned things up.  I used 7/16-14 square nuts as they fit perfectly inside the lower blocks without rotating.  I'll probably see about putting a tack weld on each nut when we drop the axle to put the "lift kit" back in place (more on that below) to keep them in place should the axle need servicing in the future.


Torsion spring engaged and ready for assembly
One down.....
....two down....
...left side in place but.....
....I guess a little persuasion will be needed here!
Meet The Persuaders:  Mr. Sledge and Mr. Bar


Lest you fear, gentle readers, I had to wail (I love that word when describing work - wail - I crack myself up!) on the pillow block to get it into place to slide over the carriage bolts, I actually found the crow bar gave me more precise positioning and once the springs compressed slightly, over the bolts it went.

There you go and Bob's your uncle!


Now you might notice I haven't put the "lift kit" back in place.  I'm working on the tapered washers; once I have those, I will measure the frame carefully to more precisely drill a new set of holes in the I-beam sections.  After things are ready, then the "lift kit" will go back in.  It'll be improved with a piece of square tubing running laterally between the left and right I-beam sections to eliminate any chance of sideways motion.  It's worth the extra work:  I don't savor the thought of the drop down snagging on anything on the dirt roads I traverse to get to my favorite camping sites.

Cleaned and ready for further engineering before reinstalling


Eight of these and we'll be ready to put the lift kit back on


Next question:  How large should the wheels be?  I have 3 non-matching rims with 2 good tires but I'm not sure if these are quite what John Serro had in mind.  The tires are P205/75R15's which if I recall correctly is a light truck tire. 


The black cat caught a mouse earlier in the evening so I'll let it be in the photo
Do these tires make my wheels look large?


I'm sure you've noticed the missing frame laterals:  One in front of each wheel and one in the streetside rear.  Now that the frame is semi-roadable, it's time to talk to my friend Mitch and see about doing a little welding! He and his welder live down at the other end of the block - now to get on his schedule.  Between being a partner in a small business which builds robotic vehicles, family man and a lay clerical leader in our congregation, he's a busy guy!

This will be an actual weld repair as this lateral fatigued through
Both these laterals are more of a "weld me back on" job


Once the welding is done and the "lift kit" is back in place, it'll be time for the POR-15!

Sunday, April 14, 2013

I've got a question for YOU....

While I work on fabricating the brass bushings for the axle pillow blocks.....
 
A really good idea......


.... click here for more details!

 ......I'm trying to figure out the geometry on the "lift kit" my Scotty came with.  It appears a former owner along the way added about five inches of ground clearance to the frame by placing a section of 5-inch tall I-beam between the frame and the axle assembly.  During the 265-mile trip home, the trailer followed right along at 60+ MPH without any hint of actually being behind the truck - no swaying, no bobbing, and even without the "plastic graphite" axle bushings (but quite a bit of hardened grease!), no banging either!  Before I reassemble the axle into the pillow blocks and reattach it all to frame, I want to make sure the "lift kit" was properly engineered or at least has a reasonable amount of science behind it to ensure safe trailering.

On site before bringing it home - it doesn't really look "lifted", does it?

End view - but it isn't quite square


I can correct the lean of the I-beam by using a wedge-shaped washer for each of the bolts.  The bolts were bent by the nuts securing them through bearing on the angle of the underside of the flange.  I've seen square wedge-shaped washers somewhere in the past.  I'll need two on the top, two on the bottom - four for each side -  eight in total.  If the holes in the I-beam are correctly offset from the edge (as viewed from the end) and with the addition of the wedge-shaped washers, none of the bolts should end up being bent like the original ones I removed from the frame.  Now for the big question:

Certainly robust enough!


Why were the pillow blocks set 2" to the rear in the first place?  The photo above shows the carriage bolts - the front one at the intersection of the cross member and the 2" frame tube - and the other a little less than eight inches behind that.  The pillow blocks are mounted on the lower flange and 2" aft of the centerlines of the carriage bolts.  The only reason I can see for setting the axle back is to lower the now-elevated center of gravity slightly by relocating it rearward.

But is that really why?  What was the reasoning behind it?  Was this an idea that was published in a old edition of Trailer Life?  Since this trailer handled so well for nearly 300 miles, should I trust what was done?  I need the ground clearance as I camp in places that often do not have much asphalt.  What would you do?

Sunday, April 7, 2013

I love April 6th.....rain or shine!

I've spent much time indoors today learning much and recharging my "batteries" for the another six months.  I've also had an opportunity to work some on the sidewall design.  I want to build a stronger, better wall section for my trailer with improved insulative properties than the original single sheet of plywood and foil paper insulation.  It also needs to provide appropriate support for interior features and joints in the birch veneer.  In other words, it needs to be functional and decorative!  Let's see what's shaping up....

The "riser kit" is not shown in these views


My plan is to laminate two layers of 1/4" plywood together crosswise to create a blank wall that will be 10 feet long and 5'4 tall (the aluminum siding is 118 inches long by 61 inches tall).  From there, the siding will be laid out and it's outline traced on each wall and then cut out.  Next the door will be partially cut out (for structural safety) and the windows cut in.  Using the proposed plan, the voids will be cut into each wall and the waste wood reserved for building other internal structures such as the dinette, the galley cabinetry and the gaucho shelf and extension.  The voids will then be filled with tight-fitting foam insulating panels.  After a preliminary fitting to the floor, the birch veneer will be applied and trimmed to size.

It will take 4 - 1/4" sheets of plywood for each side - 8 sheets total
The veneer will only take 3 - 4'x8' sheets to do both walls


Of course, more will be required to do the roof but it's one step at a time, even in the planning stages.  And I haven't even completed frame reparations yet!  Speaking of  the floor...

Careful fitting will be required here!


Three sheets of 3/4" plywood will make up the floor which will be just enough material to make up the floor and the step-down.  I guess I need to hop-to on getting the frame and suspension so I can make some progress before mowing and watering the lawn begin to consume my time!

Tuesday, April 2, 2013

Spring has sprung....

So it's been a great couple of days weather-wise and as such, the camping bug is in the air. 

I'll campout in the driveway if necessary!


The pillow blocks cleaned up nicely after a little glass bead blasting.  It has been suggested that a split brass bushing would suitably replace the "graphite plastic thing" that originally was installed in the larger (upper) half.  I'll need to measure the axle precisely as well as the blocks to create an appropriate split bushing.

Garfield first frame:  "Welcome back to "When Wildlife Snaps!....""


In order to accurately reproduce the walls of the trailer, I will need to basically trace both aluminum skins and cut both sidewalls simultaneously.  But more than that, I want to be able to project that information onto a CAD drawing for planning purposes.  Many have suggested scaling from a grid or tracing onto paper or cardboard and measuring but I think I've come up with a better idea.  After I moved the sheet metal to my storage bay I noticed a vacant unit across the way and the idea happened.  What if I were to place each skin perfectly flat against the wall, take a photo from a distance to minimize parallax distortion then import that photo into AutoCAD to electronically trace the exterior and fenestration profiles.  I tried this out using an earlier photo of the trailer that was taken nearly square on and it tested favorably.  A call to a friend with a good camera and a tripod was next....

The tripod-mounted camera was place about 40' away.....
....and centered on the small square in the center of both sides


The high-quality photos were then imported into AutoCAD, scaled to get the tan stripe on each photo to equal one foot in length and then the tracing began!  Next, I mirrored the tracing from the curbside over to the street side and fortunately, it matched very closely.  From there I added the newly traced wall profile to the frame and cabinet view and the result was.....

Step 1
Step 2
Step 3...I think I'm getting somewhere!

Now over to the streetside....

Following the same procedure...
Followed by....
Here's the other view!

A few cabinetry design refinements and things will be pretty well defined!  Then to add large amounts of $$!
 
It's getting close to camping season, I can practically taste it.....

Last weekend of every month starting in 7 weeks!